In this tutorial, I will show you how to export your eclipse project into jar file.
Open Eclipse and the project you would like to make into JAR.
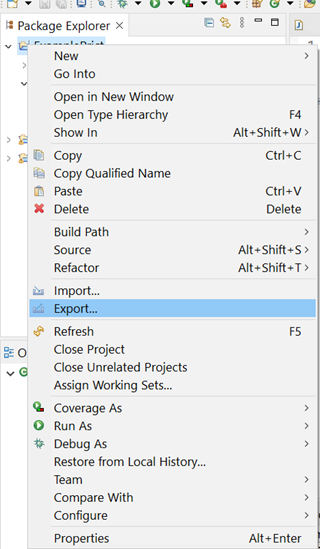
Right click on the project folder in Eclipse -> Export, just as it is shown in the figure below.
After clicking on Export there will be displayed prompt, which looks similar to Figure 1.2.
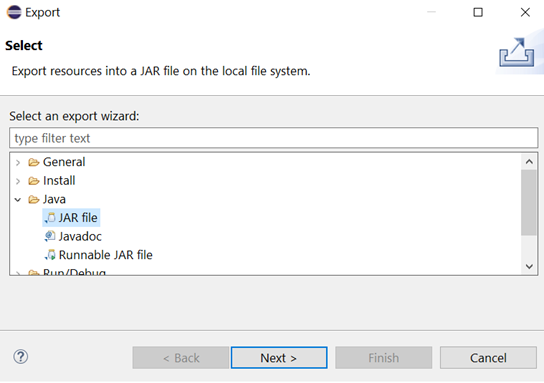
On this prompt select JAR file. This will take you to the next prompt (Figure 1.3).
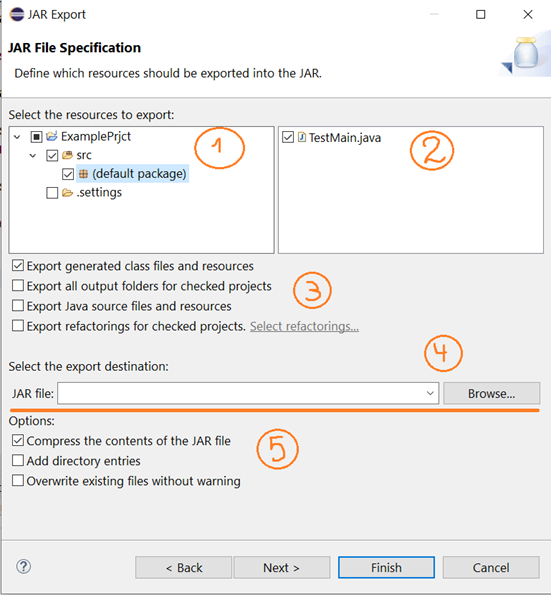
This is important step. In the part, where is marked with (1) you select the src folder and the files, which you want to include in the jar file. In (2) select them.
In (3) mark “Export generated class files and resourses”, this option will include compiled class files in the jar file.
The next step (4) is to select the export destination. That means where you want to be located the jar file. You can export it in desktop.
In (5) mark “Compress the contents of the JAR file”, which will compress the content and the jar file size will not be that huge. After this options, click NEXT.
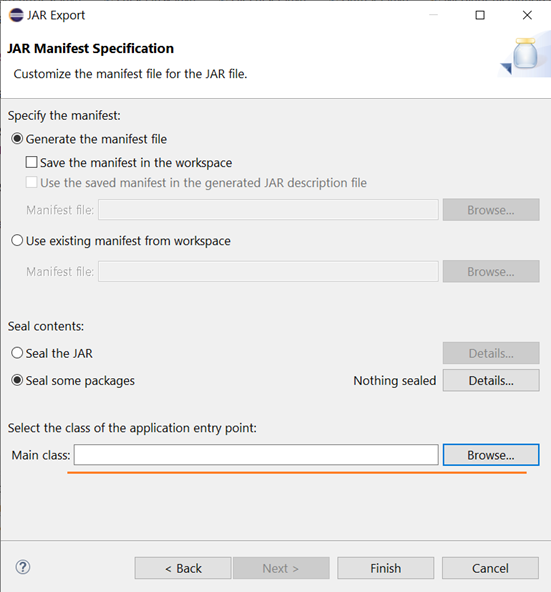
The last export option prompt is for the Jar Specifications. Here I have marked you the field, which you should modify. You should pick the class, which contains main() method. This is important step, if you want to make your jar runnable. After that you just press Finish and your jar file will be made in the destination folder.
